本文分别介绍Ubuntu和Android下操作BLE GATT的两个工具。
nrf-connect和gatttool都可以读写BLE device。nrf-connect有列出不同UUID对应的人可识别字符串,对于调试更直观。
Android 链接到标题
Android上使用nrf-connect可以读写BLE GATT,下载apk安装即可使用https://github.com/NordicSemiconductor/Android-nRF-Connect/releases
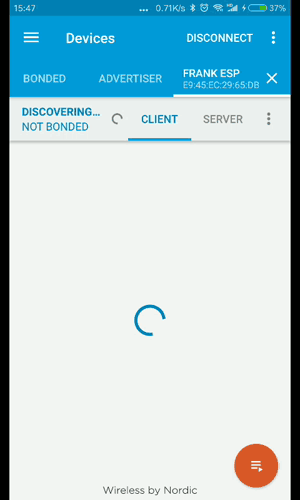
nrf-connect很直观,不做介绍,看演示图即可:
Ubuntu 链接到标题
前提:Ubuntu PC上由蓝牙4.0一样的适配器 Ubuntu 18.04默认安装了blueZ和hcitool&gatttool Ubuntu上使用hcitool进行scan和gatttool进行connet和读写GATT
hcitool 链接到标题
- 检查dev
hcitool dev
- 扫描BLE device
sudo hcitool lescan
gatttool 链接到标题
命令 链接到标题
- 启动
sudo gatttool -t random -b E9:45:EC:29:65:DB -I
- 进入gatttool console后连接
connect
- 连接成功后查看service
primary
included
- 查看characteristics
characteristics
- 查看Descriptor
char-desc
- 读 读的参数是handle,查看characteristics和Descriptor的时候会列出来
char-read-hnd 0x12
- 写
char-write-cmd 0x12 02
进行写的时候第一个参数是Handle,第二个参数是值,使用16进制,补齐2位,省略0x,例如0x3写作03,0x5a写做5a
问题处理 链接到标题
gatttool连接时可能会遇到:
gatttoll Error: connect error: Connection refused (111)
原因有两个:
- GATT进入时一定要加地址类型
-t random
- /etc/bluetooth/main.conf中添加BLE的支援
EnableLE = true           // Enable Low Energy support. Default is false.
AttributeServer = true    // Enable the GATT attribute server. Default is false.
演示图 链接到标题
参考 链接到标题
https://www.jaredwolff.com/blog/get-started-with-bluetooth-low-energy/